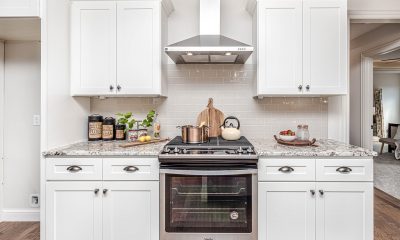
Kitchen
10 Best Kitchen Remodel Ideas 2021
Kitchen Remodel Ideas
Who said a kitchen remodel is expensive?
Deceptively Delicious believe that to completely transform your kitchen, you don’t need to save money.
Do not you believe it? Look at the photos of these kitchens before and after the remodel, and you will see that all you need to have a perfect result is a little patience and fantasy.
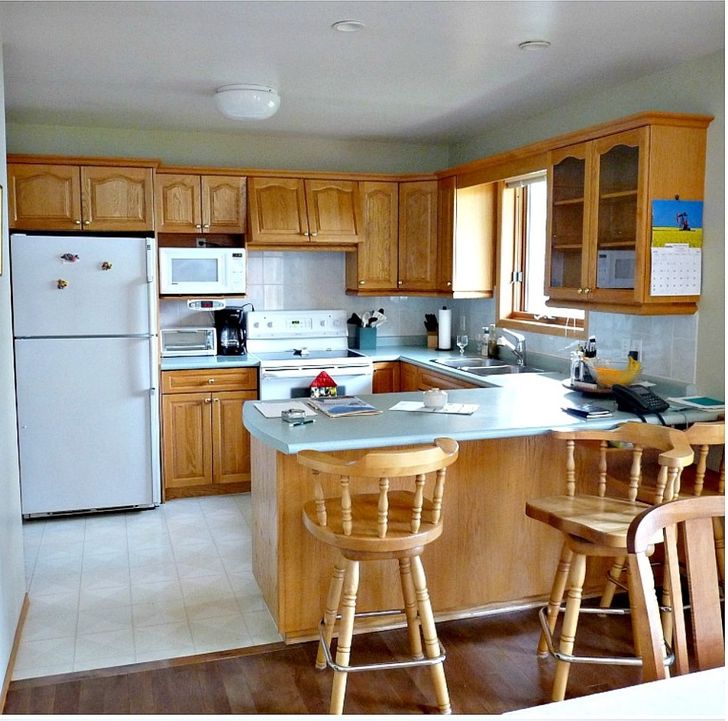
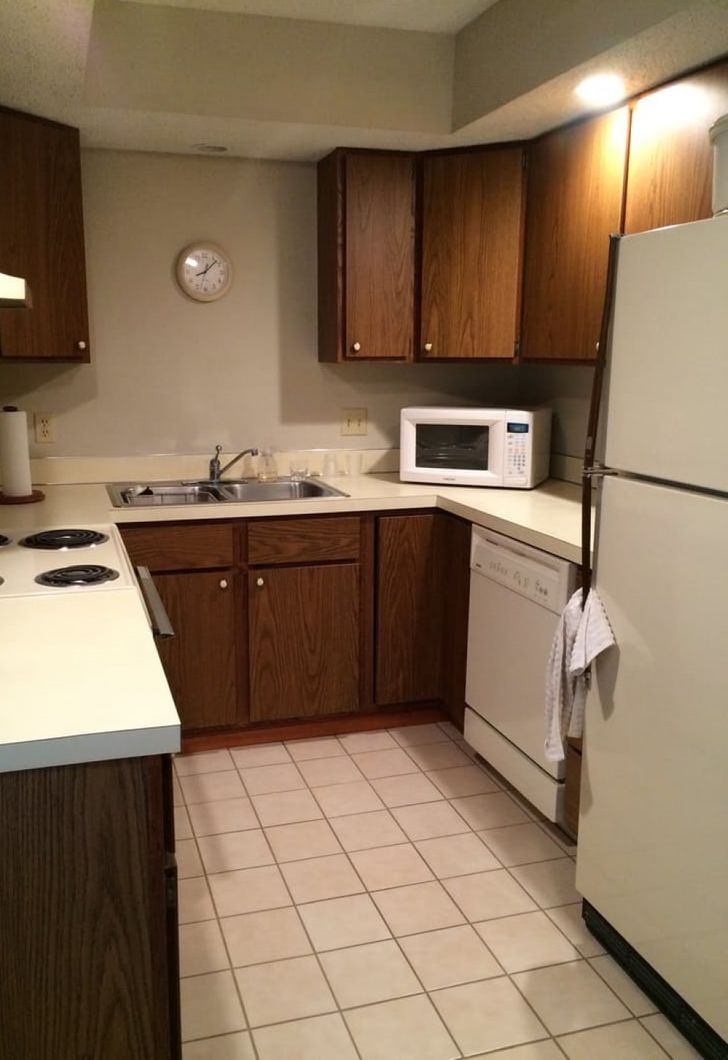
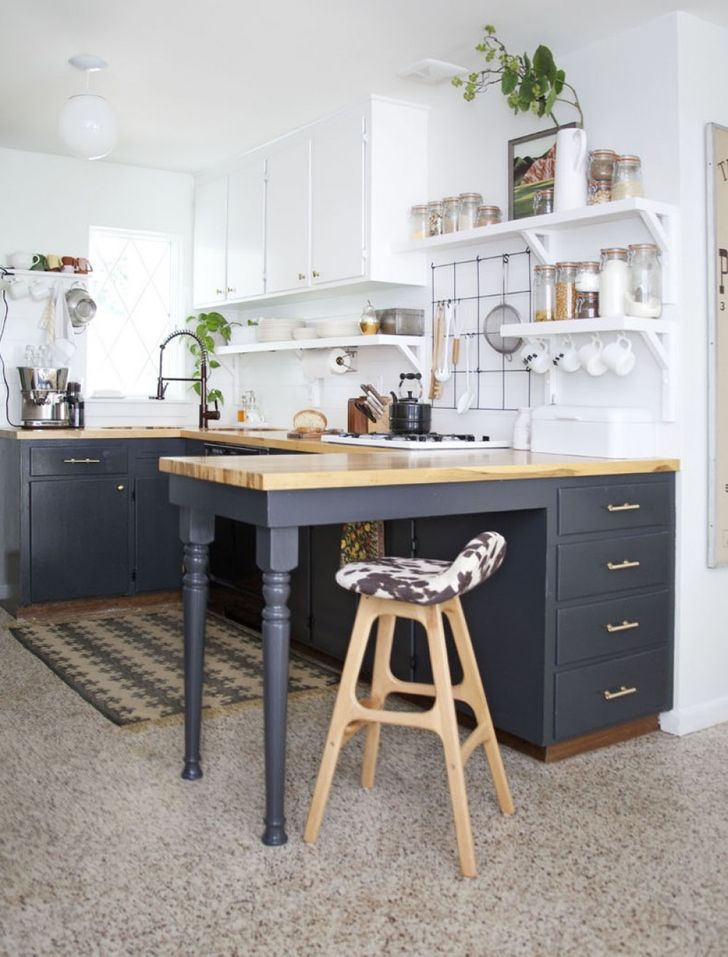
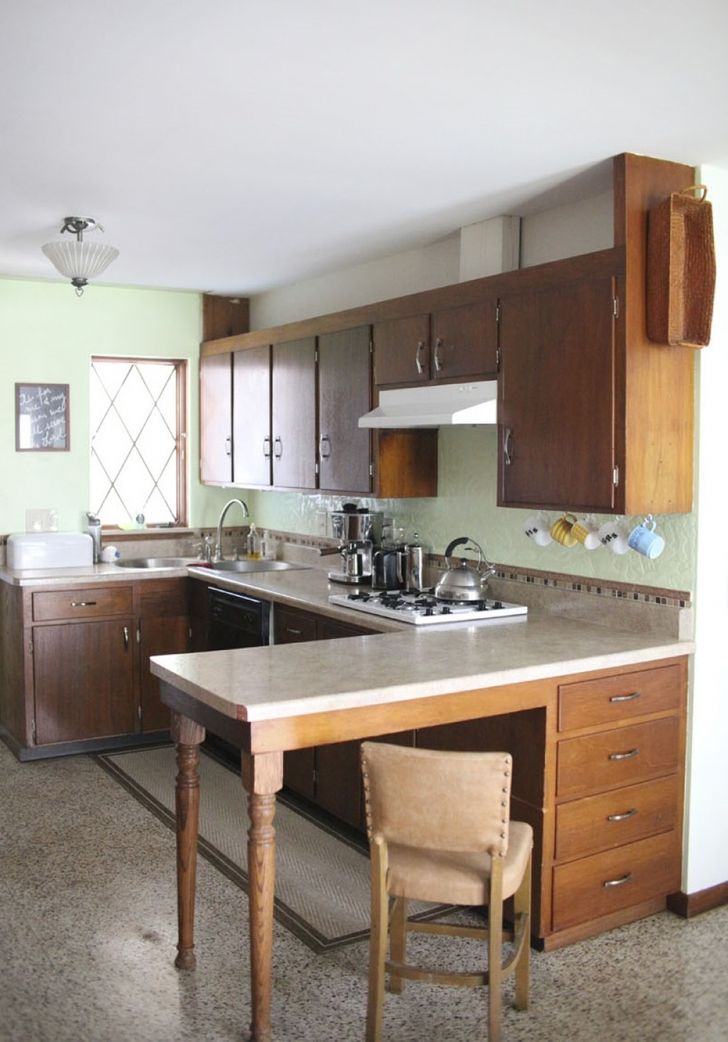
1. Paint the wooden facades in a more reserved color
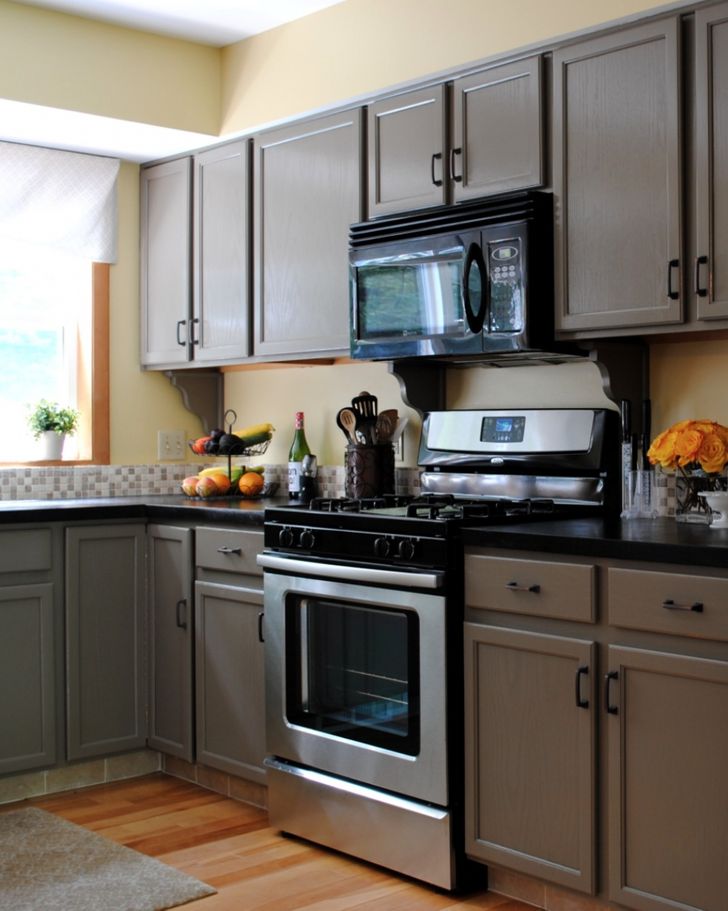
The gray paint, which was used to paint the facades of the kitchen, turned these common “grandmother’s” furniture into more modern and stylish ones.
2. Use two contrasting colors
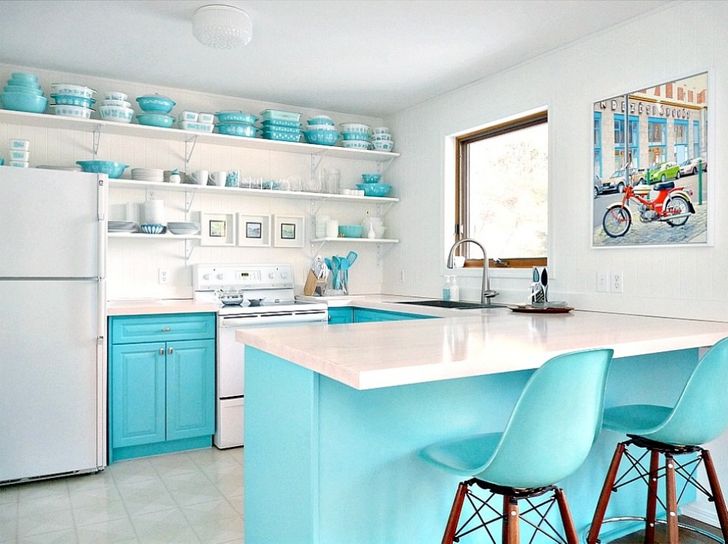
Swapping the top row of furniture for open shelves and painting the walls and furniture in a “marine” range requires minimal effort, yet completely change a dull and lifeless interior.
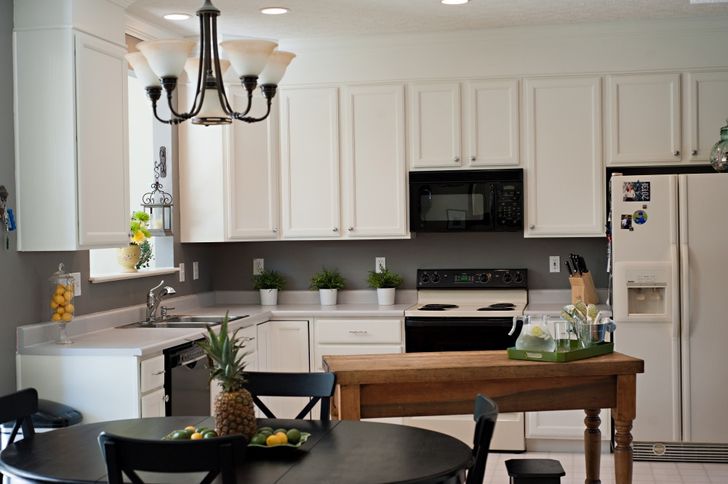
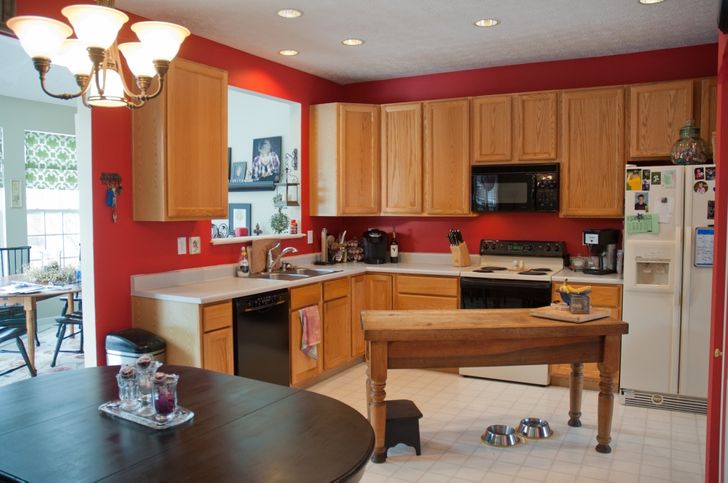
3. Make furniture and tiles the same color
Renovated facades using white paint and tiles of the same color not only make the kitchen look brighter but also make it more spacious.
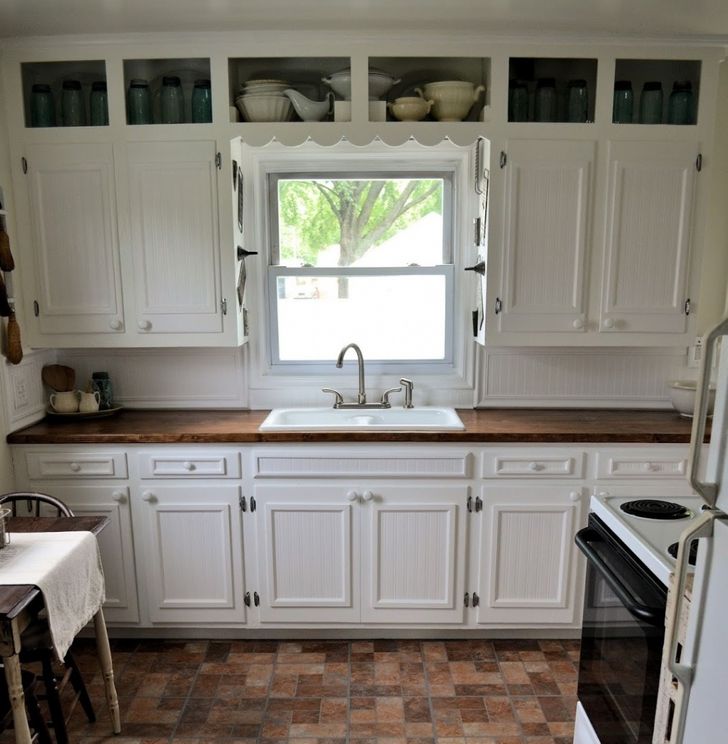
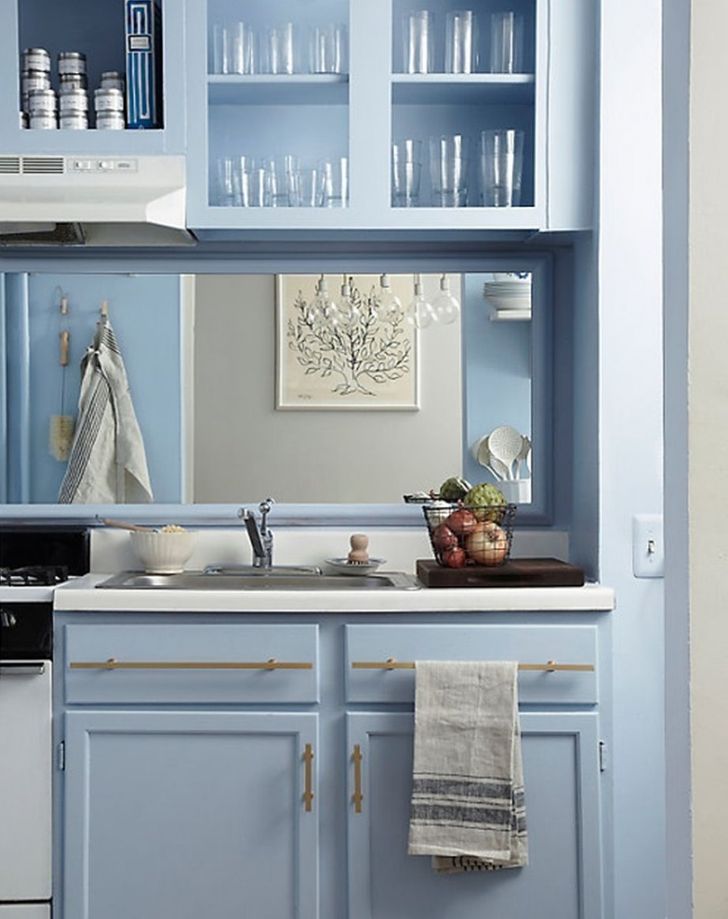
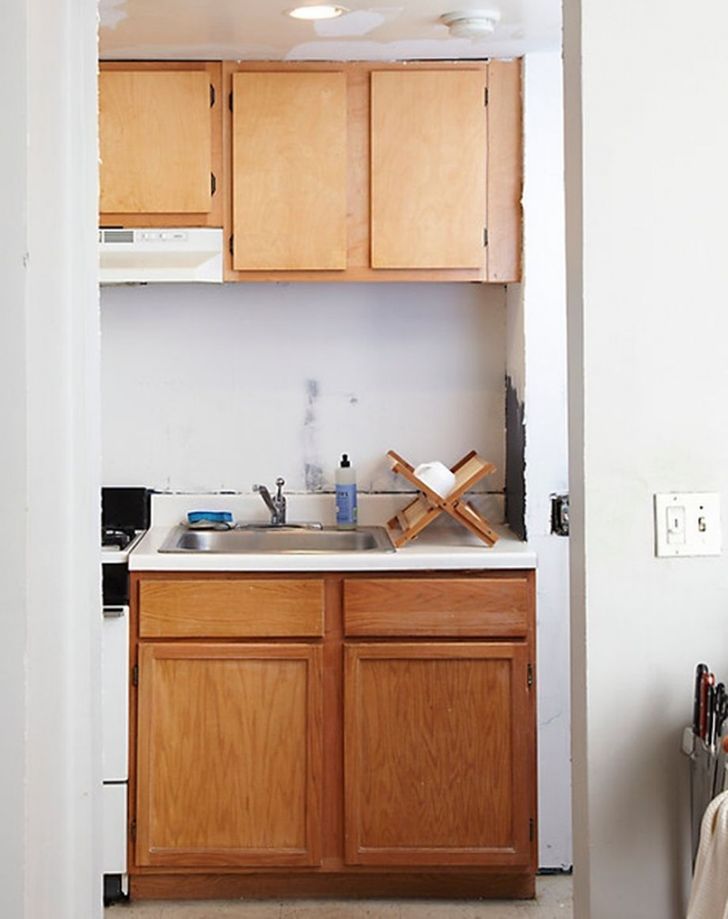
4. Add contrast and color
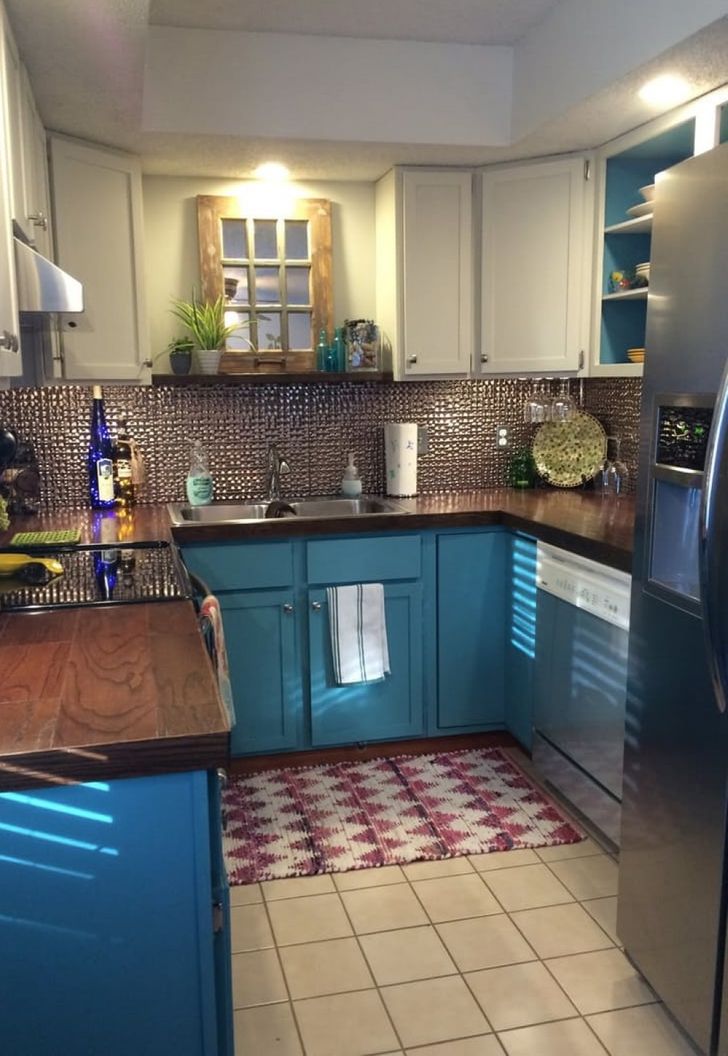
The trick to this kitchen is not only in the harmonious color scheme but also in the makeshift window, which adds more light and warmth to this small space.
See here how to do this amazing transformation.
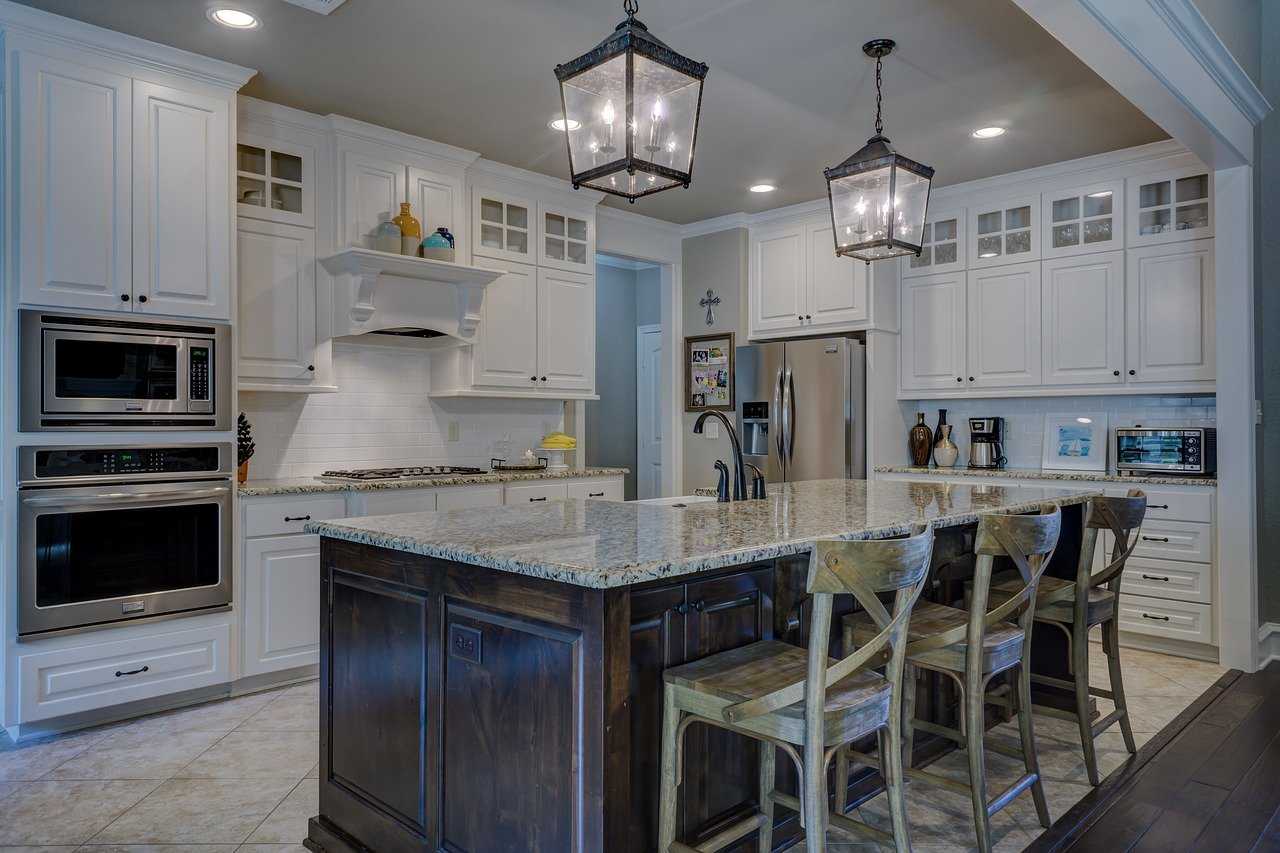
5. Accentuate work areas
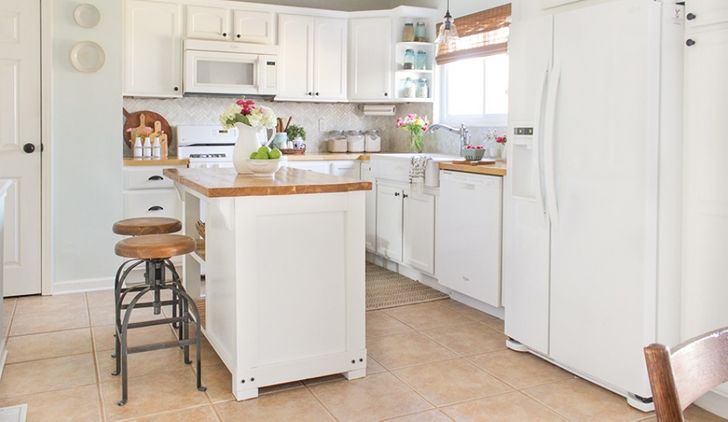

Wood surfaces in work areas look great with a white background. Together with other accessories, they do not let the kitchen become a sterile and lifeless space.
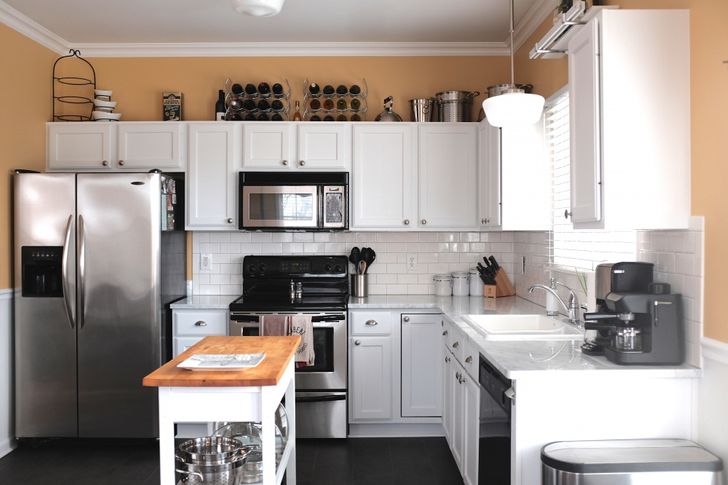
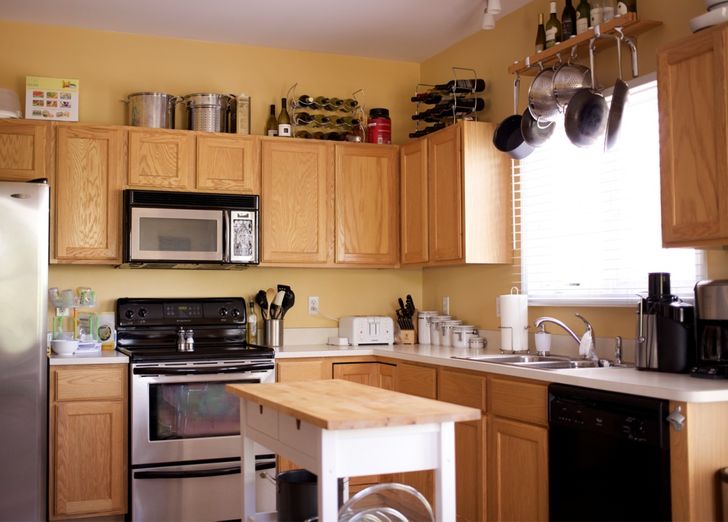
6. Change the bright colors for reserved ones
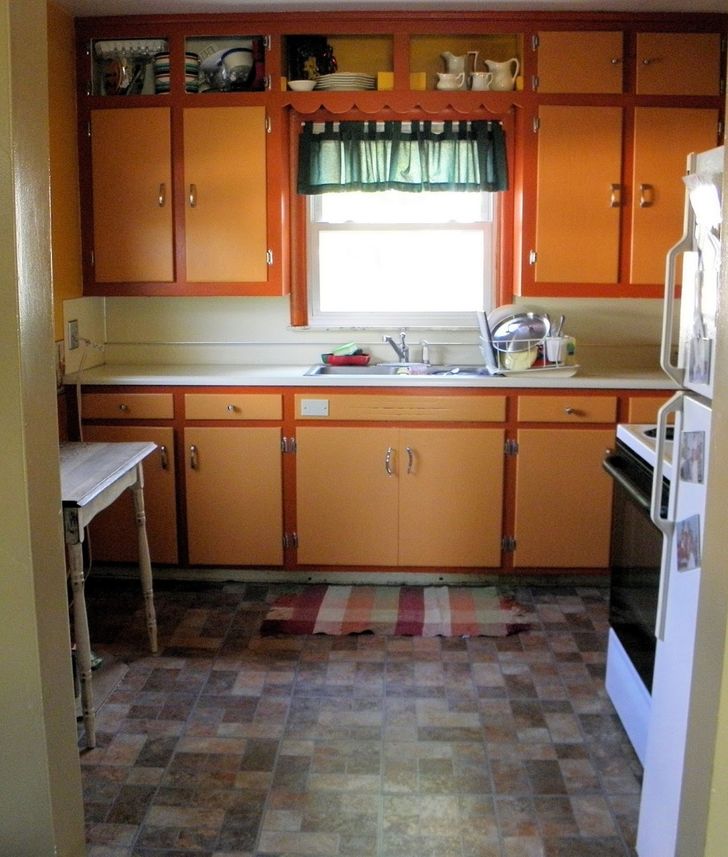
The same white paint instead of orange and the open-top cabinets turn a dated kitchen into a totally modern space.
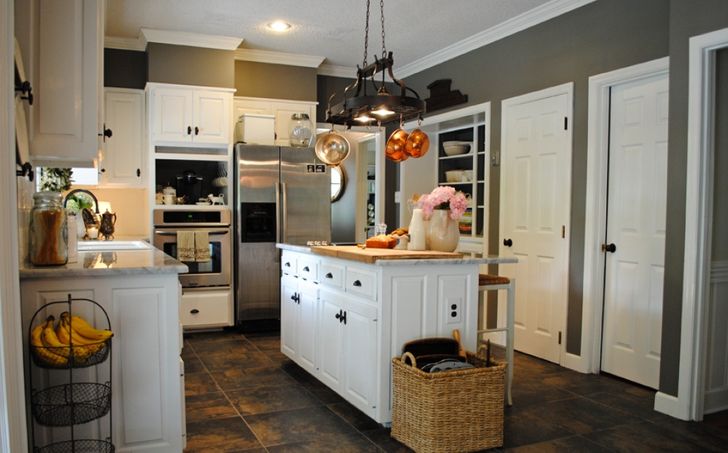
7. Free up space
The white top and dark bottom are all it takes to turn a boring kitchen into one that looks like it came out of the pages of a magazine.
Here you will know what were the changes that they made to this kitchen.
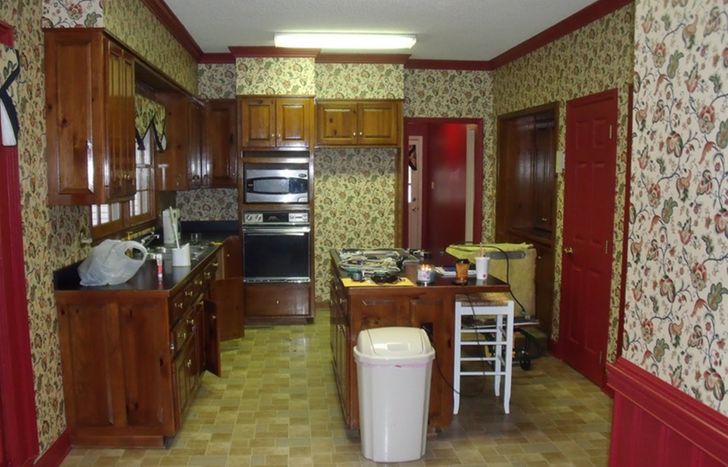
8. Give the interior a strict look
If you take a good look at the “before” and “after” photos, it becomes clear that the furniture in this kitchen is the same. But it feels like space has undergone radical changes, all thanks to the fact that the facades and walls were painted in contrasting colors and a couple of colorful accessories were added.
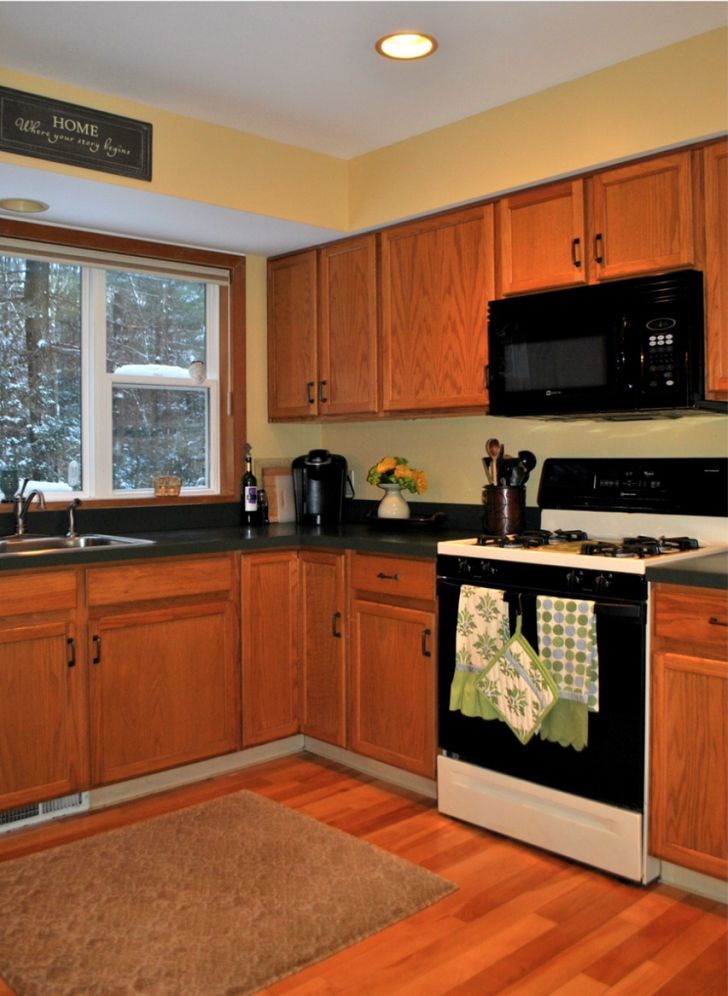
9. Give old furniture a second chance
Even the oldest interior can have a second life. The important thing is to choose a range of suitable colors and accessories.
In this article, you will know how to revive even furniture that seems to be in short supply.
10. Paint the walls a single color
They look like two different kitchens. But in reality, the furniture has not changed, they just painted everything.
Pictures credit: wl-genial

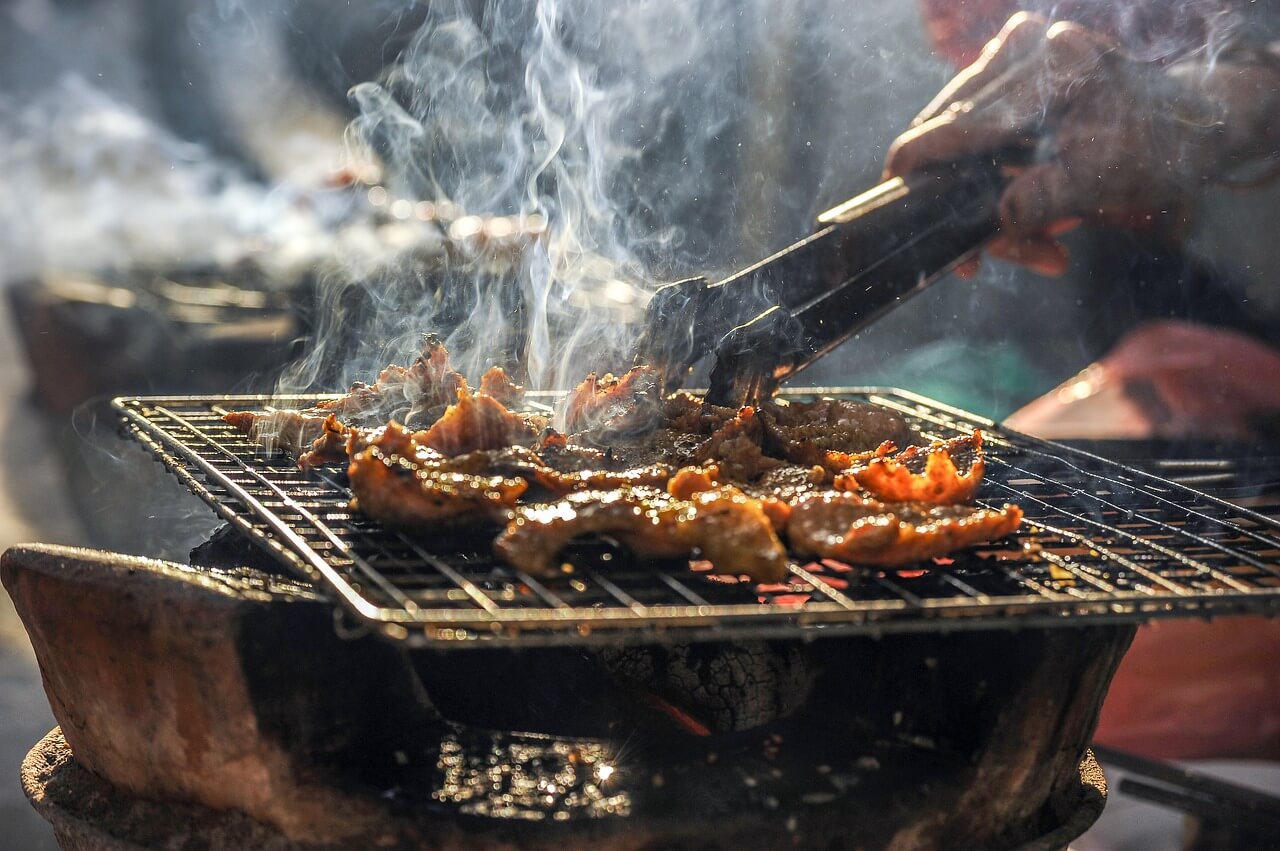
BBQ
Summertime is all about relaxing, friends and family, and sharing good food and good times. One of the best things about summer is the grilling. There is nothing better than the smell of barbeque meat in the air. However, summer is also a time for sun exposure, which can lead to sunburned skin.
If you want to enjoy barbeque season without the hassle of sunburn and without spending too much time in the sun, read this article to learn how you can set up an indoor BBQ with minimal effort.
What are the benefits of an indoor BBQ?
Whether you live in the city or the country, an indoor barbecue is a great way to enjoy your summer. There are many benefits to having an indoor BBQ. First, it is great for the family to be able to enjoy the summer weather and cook food together. It is also a great way to spend time with friends and family on those hot summer days.
It is also a great way to cook food for parties and events. In addition, it is also a great way to keep your home cool during the summer. Lastly, it is a great way to cook food without a lot of mess.
How to set up an indoor BBQ
Setting up a BBQ is a fun and easy way to enjoy a summer afternoon. There are occasions though whether it is too hot or raining when you cannot enjoy your BBQ outside. This is when an indoor BBQ comes in handy. There are many things you will need to set up a great indoor BBQ, but this article will give you the information and knowledge you need to have a great time.
What is the equipment you will need
In order to set up an indoor barbecue, there are some things that you will need. The first thing you will need is an indoor smokeless grill. An electric grill can provide the great barbecue experience you want without having to tamper with smelly charcoal and messy propane tanks. There are many different models and features so make sure to take time to research before purchasing. Pat’s offers a great guide on what to look for in an indoor grill here. It will allow you to cook easily indoors and some models are versatile enough to be used inside and out.
The second thing you will need is of course some great meat for grilling. You can either buy some marinated or ready made burgers or steak, or you can be a bit adventurous, and try something new. This is the perfect time to try a new recipe that you have been thinking about.
If you are having guests that are vegetarians, you may also want to consider some non-meat courses. One of my favorites to make on the grill is a vegan quesadilla, you can get the recipe from this site. It is easy to make and tastes great.
For any successful barbecue you will also need some great side dishes. Whether your main course is chicken, turkey, or other meat you will want to have a wide selection of great side dishes. Many vegetables you can cook on your indoor grill . The best advice for these side dishes is to always stick with the classic.
Lastly, you will need a great beverage and wine to set the mood. Be sure to have a few different wines on your table so that you can sample a wide variety of wines. This will keep your guests happy and guessing what the next wine is going to taste like.

BBQ
How long does it take to set up an indoor BBQ?
If you are in a hurry, and want to get your indoor BBQ up and running as soon as possible it will not take too long. If you already have grill tools on hand, then you can be grilling in no time at all.
A smokeless grill will usually come up to temperature within a few minutes of turning it on. This will vary by the model you have, but typically the temperature will reach 350 degrees in no more than 30 minutes. As an example, my Ninja Foodie grill takes approximately 10 minutes to reach 350 degrees.
Once your smokeless grill is up to temperature you can begin preheating your bbq cooker and start grilling on it as well. Once you are ready to eat you simply remove the meat from the grill and apply BBQ sauce or ketchup.
How to maintain an Electric BBQ Grill
Most indoor grills offer a non-stick surface so cleanup is usually a breeze. There are a few things that you will want to be careful about.
One thing to keep in mind is that some indoor grills may not handle the heat as well as an outdoor grill does. If you are attempting to cook a large steak, for instance, it would be best to cook it outdoors and then transfer it into the indoor grill for serving. Always use your indoor BBQ grill with care so that you do not ruin the non-stick surface or cause damage to the unit itself.
Are There Any Other Benefits to Using An Indoor Grill?
Grilling indoors during the summer is a great way to enjoy your BBQ without a lot of hassle. There are many other benefits to using an indoor grill.
Not only can you enjoy your food without the sun, but you can also avoid some of the bugs that come out at night. If you want to impress your guests with great grilled food, an indoor grille may be the perfect solution for you.
An indoor grill can also be healthier as many have features to drain and remove grease from the meat. This is a great feature for those who want to avoid consuming a lot of fats and oils. In addition, indoor grills do not generate a lot of smoke, so you will not have to worry about breathing in all that toxic smoke coming from an outdoor grill.
Conclusion
In conclusion, an indoor barbecue is a fantastic way to enjoy your summer. You get the great taste of barbecue without worrying about sunburn or sticking to your grill. It is also a great way to cook inside on those rainy or hot days that do not make grilling outside an option.
If you follow the tips in this article, and have all the right equipment, you will have a great time setting up your indoor grill and cooking some of your favorite meats at home.

What is a pressure canner? – A simple and efficient way to preserve food
In daily life with a hectic routine and work life, everyone wants to prepare and store food to last for days so you don’t have to go for grocery or cooking frequently. Well with meat and vegetable this one is quite a difficult task to achieve. Many people use boiling water to sterilize and store food or you can also cook it and preserve it, but that won’t last for more than a week or two in the freezer.
Well, don’t worry we have brought you a very efficient and feasible method of storing your food items safely and in proper condition so that the freshness and taste remain the same. With a pressure canner high pressured steam at a 240 F temperature kills all the bacteria and microorganisms, so that the foods are canned and sterilized to last for weeks or months. You can easily store low acid items that are prone to rotting like beans, meat, tomatoes, or cooked items like soup, purees, or curries.
Here is a complete guide for you so you can better understand what a pressure canner is and it’s working along with a step to step procedure for sterilizing your food with a pressure canner.
What is a pressure canner?
A pressure canner is a steel or aluminum pot that comes with a lid that locks in and has a pressure valve or pipe that is covered with a dial or gauge to apply some weight and a pressure plug to relieve the pressure before you unlock the lid. A pressure canner is usually similar to the pressure cooker we use for cooking but the heat and pressure handling to sterilize cans containing food is different.
How does a pressure canner work
A pressure canner uses pressurized steam to sterilize the food by killing all the bacteria and microorganisms in it so that the food items are safe to keep in the fridge to be used for a long time. Pressure gauge on the lid is used to vary the temperature by increasing or decreasing the pressure.
As steam is hotter than the boiled water the sterilization of the cans is better and more effective. Pressure canner can heat up to 240 F or more at increased pressure by either the weight or by the burner flame. When the less acidic foods are sealed at this temperature they are good to go for months.
Types of the pressure canner
Based on the regulating system of the pressure on the lid of a pressure canner the pressure canner is divided into two subcategories that are:
1. Pressure canner with dial gauge
Dial gauge pressure canner has a dial on the lid that shows the pressure inside the pressure canner. You can check all the time that either the pressure is at the required PSI or not and alter it by regulating the flame of the burner.
Although the accuracy and maintaining a constant pressure all along is achievable with this type of pressure canner they require complete attention and aren’t self-regulating. So for precision-loving people, these are a good fit but they will take your hour or more for continuous monitoring that you won’t prefer usually.
2. Pressure canner with a weighted gauge
In a weighted gauge canner, you have weight available on the steam valve that applies pressure required from 5, 10, or 15 valves whatever you prefer according to your location altitude. This weight jiggle every minute and release some steam indicating that the pressure canner is at its required pressure and the food is being cooked or sterilized properly.
This kind of pressure canners are self-regulating and maintain the pressure without you watching over. With the ease of no monitoring comes a drawback of limited pressure options that are only 15, 10, or 5 PSI, contrary to the dial gauge in which you can select any intermediate pressure.
As with glass top stoves, canning is to be done with extreme care so weighted gauge canners are the best pressure canner for glass top stove due to proper monitoring and pressure regulation with no increase in pressure even if you are not there.
Benefits of using a pressure canner
You must be thinking now that why on earth you should buy a pressure canner that is not too cheap, plus with all those frozen vegetables and meat available in the market doing so at home is an extra task. Well here are some major advantages that using a pressure canner to can your foods implies. Let’s have look at them:
- Fresh and safe
With a pressure canner, the food is preserved with its original taste and texture, so you will get your meat or soups as fresh and tasty as they were canned.
- Cost friendly
All that frozen food costs you a fortune every month with a somewhat less appetizing taste, while when you pressure can your food at home that saves you a lot of money and is also tastier and healthier
- Store without freezing
Pressure canned food is good to be kept on a shelf or kitchen cupboard and won’t require you to keep them in freezers or cold boxes to prevent them from getting stale.
- Customized as per your taste
For people who are allergic or want to cut some spices or salt from their diet, pressure canning their food is great as they can add whatever ingredient they like and don’t have to read the ingredients table on each frozen product before buying.
Step by step guide for pressure canning
Now while we are now well convinced about buying a pressure canner and what great benefits it has, let us dig into the procedure of pressure canning your vegetables, fruits, soups, or steaks. Follow this step by step easy guide to pressure can your food conveniently and perfectly.
1. Pre heat empty jars
Fill your pressure canner with water and heat it to boil. Well, you must be thinking about how much water in the pressure canner should be filled? , you can only fill 2 -4 inches on the bottom of the pressure canner as it works with steam, not the boiling water.
Heat the jars for 3- 4 minutes and then take them out
2. Fill the food items in the jars tightly
Now fill the jars tight with anything you want to store like beans, peas, soups, or meat so that the container is filled completely
3. Use a spatula to remove any air bubbles
With the help of a rubber spatula moved along the walls of the jar or press down the food a little to remove any air bubbles in the jar.
4. Wipe the rim and lid of the jars
Now wipe the rim and the lid of the jars to remove all moisture and lock them tightly onto the jar that it’s not openable easily.
5. Place in the heated up pressure canner
Now with 2 to 3 inches of simmering water place all your jars to be pressure canned carefully and lock the lid of the pressure canner with no weight on the pressure vent.
6. Let it heat for 10 minutes without a pressure gauge
Without any weight let the water steam up and leave through the vent pipe for 10 minutes
7. Place the gauge and steam for the required time
Once the pressure is created place the regulator and let the jars steamed for a suggested time at the proper pressure to seal the jars completely
8. Depressurize and unlock the lid
Keep in mind to first open the vent pipe to relieve pressure, then remove the weight or dial gauge and then unlock and open the lid.
9. Let the jars cool down
Now let the jars cooled down for 12 to 24 hours outside in the air.
10. Check the lid for proper seal and store
Check with fingertips that either the lid is sealed or not and if there are complete seals then you can safely place them on the shelf or fridge as you like.
What foods are good for pressure canning?
Although any kind of food item can be pressure canned it is more preferable for items that are low in acidic value and can be kept in an acidic preservative like vinegar in pickles. Here is a list of some products that are good to be pressure canned
- Meat and meat stocks/ broth
- Vegetable soups or broths/stocks and beans, tomatoes or potatoes, etc.
- Baked beans or cooked chili
- Pasta or pizza sauce that contains onions, tomatoes, or mushrooms in them
- Any soups or cooked stews
Which items you should avoid using in a pressure canner?
While you aim to pressure can your food here are some items that you should never put in a pressure canner, as they won’t get preserved and also will cause a mess. These items to be avoided are:
- Any kind of dairy products be it milk, yogurt, cream, or butter
- Starchy foods like pasta, spaghetti, or rice
- Eggs and egg dishes
- Thickeners like flour or cornflour
- Coconut or almond milk.
FAQs
1. How much water can you put in a pressure canner?
There are only 2-3 inches at max water requirement in a pressure canner to create steam for canning jars.
2. Is pressure canning better than boiling water?
As steam is more pressurized and hotter than boiling water the process is better and more effective
3. How much a pressure canner cost?
On average, a pressure canner costs a thousand dollars and more depending on the capacity and quality.
Summing it up!
Hopefully, you found this article helpful in getting the know-how about what is a pressure canner and it’s working and canning procedure.
Pressure canning is for sure one of the best way to preserve you low acid content food items so that you can enjoy your favorite vegetables off-season or have a homemade can of soup available after you came back on a chilly evening to the home
Follow our easy guide to can your food to perfection.
Stay connected for more information and guides like this
Best of luck with your first canning session at home!

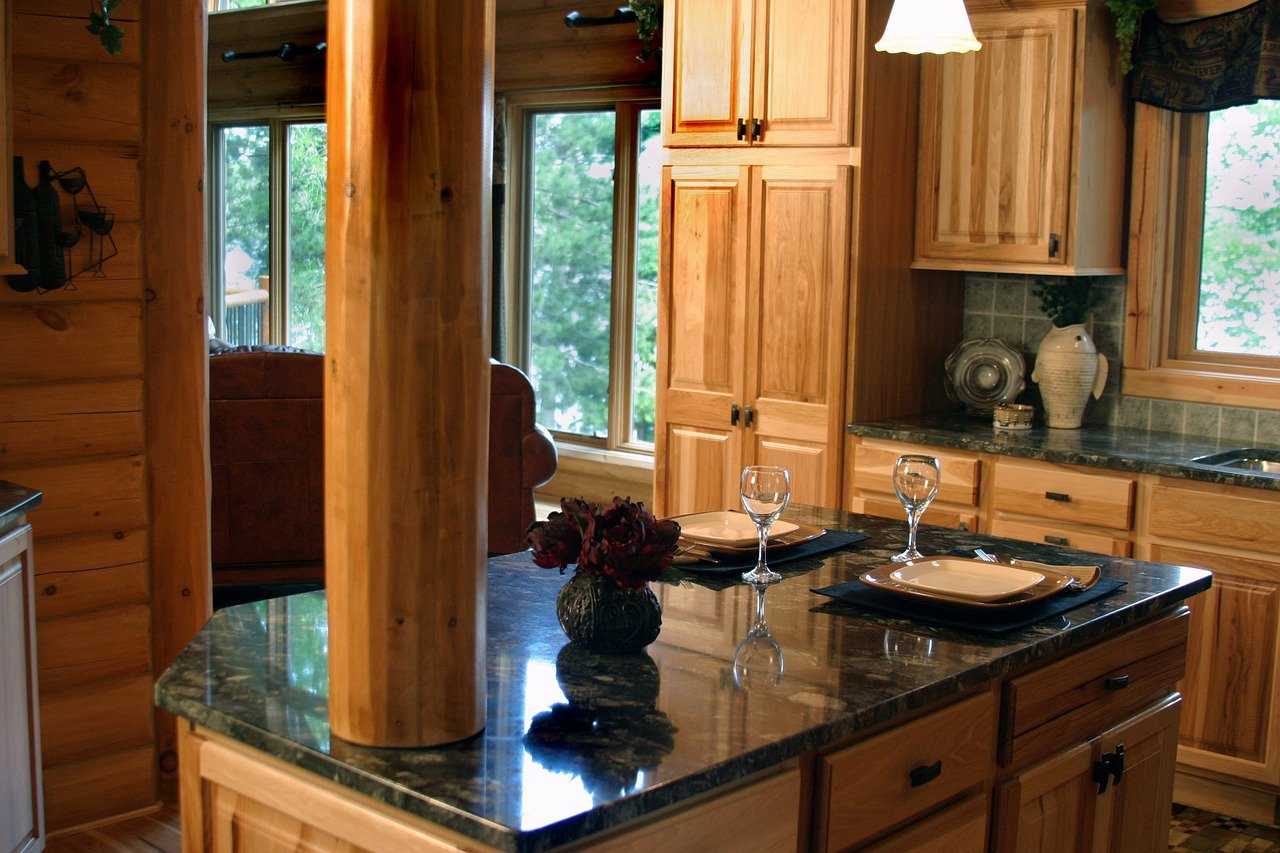
Countertops
Would you like to have your kitchen as the first day for years? No, it is not a dream. Having your kitchen like new is very easy if you follow these 10 tricks to take care of your countertop. The future of your kitchen is in your hands!
The countertop is one of the most used parts on a day-to-day basis and is exposed to continuous actions that can deteriorate it, so taking care of your countertop is essential. A correct choice of the material from which our countertop is made is a key point in its maintenance.
Choice of countertop
There are many options that we have today for our kitchen countertops, but your choice depends on whether you have to change it in 2 years or many more.
We bet on the best for your kitchen, where quality, safety, and design are the main points on your kitchen countertop.
When choosing a countertop for your kitchen, reason, and emotion have to go hand in hand, since it is so important that the countertop be able to last 20 years in perfect condition, as that in 20 years you will still be in love with it. A sure hit? The Silestone Helix model in the image.
Tricks to take care of your countertop and make it look like the first day
Countertops
And, if in addition to making a perfect choice, do we take care of our countertop in a few small steps? The result is to enjoy the kitchen of your dreams for many years.
1. Daily cleaning, easy and fast!
A thorough cleaning of the countertop is not necessary, but keeping it clean will help keep it in perfect condition over the years.
2. Dry and shiny, so yeah!
Drying it after cleaning contributes to its maintenance, lengthens its optimal state and, in addition, we prevent watermarks from leaving any streaks on the surface.
3. If we have a stain, let’s go for it!
If we remove the stains when they have been in a short time, we avoid that grease can become embedded in our countertop and that the material can become contaminated and deteriorate.
4. Avoid extreme heat sources
Using protectors when we place very hot pans is a small action that our countertop will thank us for.
5. Say yes to cutting boards
Cutting into the countertop may seem like a good idea to us, but even if the material is scratch-resistant, continued use can cause erosion of the countertop.
6. Use products that are not aggressive for daily cleaning.
The granite or quartz from which Silestone, Sensa, or Dekton countertops are made, are very resistant materials, but the continuous use of very strong degreasers can end up damaging the countertop. The same happens with steel, we will have to choose cleaners for this material.

Countertops
7- Avoid the use of bleaches or chlorine disinfectants.
Bleach is a product that, used continuously, can damage our countertop. In the case of specific cleaning, it is important to rinse afterward with water to minimize the aggressiveness of this cleaner.
8. Beware of chemicals.
If we use ammonia it is very important not to mix it with chlorine because it can damage the material and, also, give off very harmful gases.
9- Do not polish our countertop!
The materials are manufactured in such a way that they have protection against stains and heat and, if we polish it, we will lose that layer on the countertop.
10. Clean in circles, said by the experts!
Brands such as Silestone, recommend cleaning stains by making circles, as it helps the material suffer less from friction.
These are just a few tricks to take care of your kitchen countertop, and you don’t just have to make the right choice in the materials. This decision, although complicated, is very important. Request your budget, we will make your kitchen like one of your dreams.
Read More Stuff

 Organic3 years ago
EatMyBananas.com Shares A Shocking Ingredient In One Of Their Local Dishes
 Food4 years ago
Food Web Creator (Maker)

 guide3 years ago
12 Super Fresh and Easy Summer Recipes
 Education2 years ago
What is an Induction Oven & How Does it Work?
- Germany-De3 years ago
Kürbissuppe – Rezept Cremig Geröstete

 Fruits3 years ago
Top 10 Fruits for Weight Loss
 Organic3 years ago
What is a healthy diet?

 Food3 years ago
Mango Juice