
Food
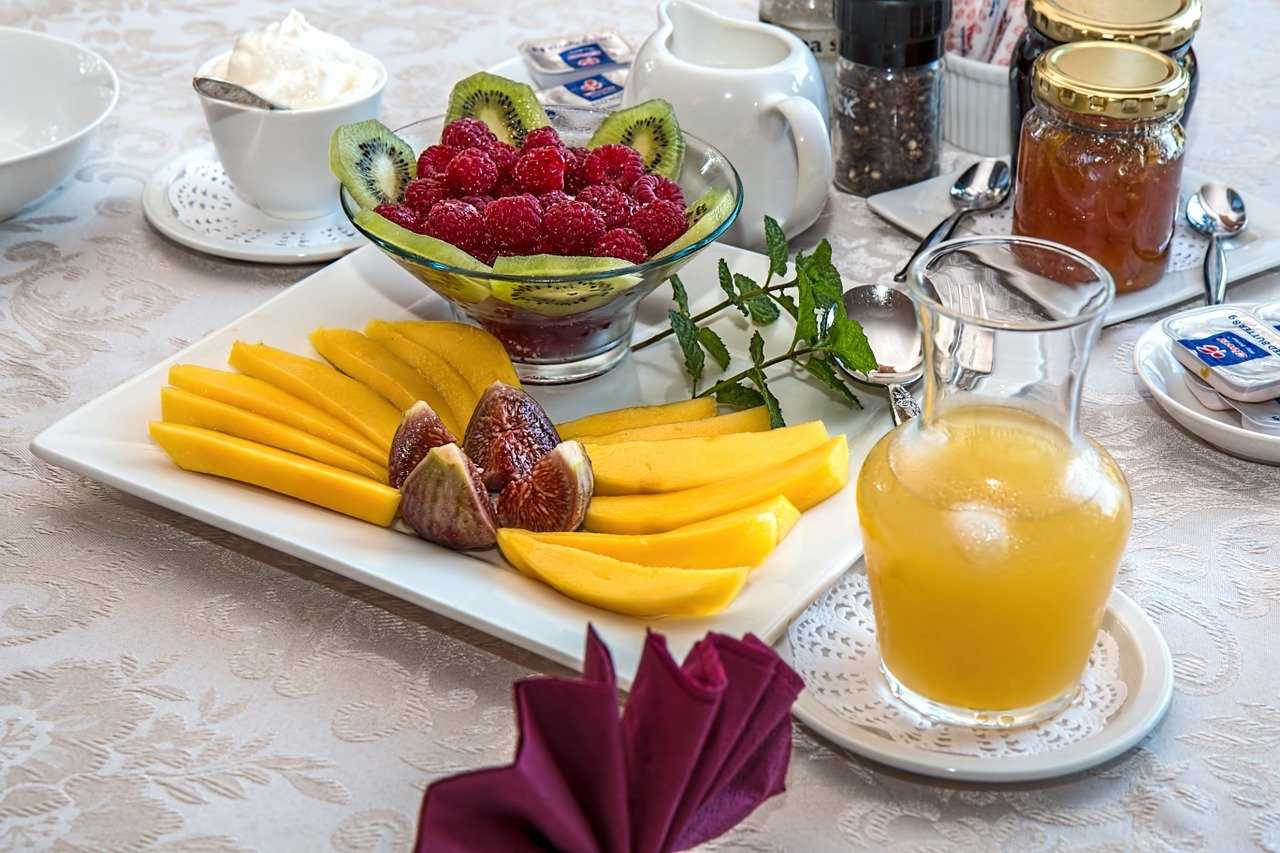
Mango Juice
If you are looking for a very refreshing drink that gives you the energy you need to face a tough day, then we recommend that you try our Mango Juice recipes.
They are a delicious way to start the morning with a nutritious breakfast that provides us with lots of vitamins and nutrients.
The main ingredient in this recipe is mango, which is a food rich in antioxidants, calcium, and vitamins A and C.
The consumption of this fruit is recommended to prevent and help against heart diseases, as it is considered a great food to take care of our skin and purify our body thanks to its diuretic properties.
Index [ Hide ]
- 1 How to make Mango Juice?
- 2 Mango and Orange Juice
- 2.1 Ingredients
- 2.2 Recipe
- 3 Mango and Pineapple Juice
- 3.1 Ingredients
- 3.2 Recipe
- 4 Mango and Banana Juice (or Banana)
- 4.1 Ingredients
- 4.2 Recipe
How to make Mango Juice?
mango juice
Mango is a fruit that contains 84% water, and despite its sweet taste, it gives us very few calories.
For this reason, it is a highly recommended fruit for this type of recipe, since, thanks to its large amount of water and sweetness, we will not need to add other liquid ingredients to achieve a good texture in our juices.
In addition, since they contain so few calories they are ideal for people who want to lose weight and are on a diet to lose weight.
Mango and Orange Juice
Mango and orange are two fruits that always combine perfectly in any recipe, and that is why we are going to teach you how to prepare a Mango and Orange Juice that you are going to love.
Orange is a citrus fruit that contains a large amount of Vitamin C and antioxidants, and therefore perfectly complements the nutritional qualities of Mango.
If you want to learn how to prepare more recipes with this citrus fruit, don’t miss our Orange Juice recipe.
Ingredients
- 1 handle.
- 2 oranges
- 2 or 3 ice cubes *
* If you cut the mango into cubes and freeze it, you will not need to add ice to the mixture, and you will have a more concentrated and flavorful result.
Recipe
- Peel the mango and cut it into medium pieces.
- Cut the oranges in half and squeeze their juice.
- Put the mango and orange juice in a blender and beat until everything is well blended.
- Now is the time to add the ice and beat again to achieve a fine and homogeneous texture.
- As the last step, pour the juice into glasses and enjoy this fantastic combination.
Mango and Pineapple Juice

Mango and Pineapple Juice
Pineapple is a fruit well known for being a great diuretic power, which together with mango form an excellent combination loaded with vitamins (A, B, and C), antioxidants, and a lot of fiber.
This Mango and Pineapple Juice contains very few calories and, thanks to its large amount of fiber, it is an excellent filling food, so it will also help you lose weight if you are on a diet.
Pineapple contains an enzyme called bromelain, which helps us break down proteins when we digest.
In addition, it is also rich in minerals such as Manganese, magnesium, iodine, iron, zinc, and potassium, which are excellent antioxidants.
Ingredients
- 1 handle.
- 3 slices of pineapple
- 2 ice cubes.
Recipe
- Peel the pineapple and cut 3 finger thick slices and cut into quarters.
- Peel the mango well and cut it into medium pieces. (They do not need to be regular, since you will grind them in the blender)
- Put both the pineapple and the mango in a blender (you can also use a hand mixer ), and beat well until everything is crushed.
- Then, optionally, you can add ice, so that you have a fresher juice. Beat again until well blended and smooth and fine.
- Finally, it is time to serve the juice in glasses and taste it very cool.
Mango and Banana Juice

Mango and Banana Juice
The recipe for Mango and Banana Juice that we propose below will serve as breakfast or as a perfect snack to satisfy hunger.
In addition, it will provide us with a high amount of water, avoiding the intake of unnecessary fat and calories.
This juice is a great fusion of flavors since by incorporating lime as one of the main ingredients we achieve a surprising mixture that will not leave anyone indifferent.
In addition, it is a fruit that is not used much or taken into account in our recipes, but that has excellent properties and benefits.
Lime is a very nutritious fruit that, although it looks similar to lemon, has a slightly different flavor and with much less citric acid than this.
It is characterized by an irresistible aroma that favors the digestive process from the first moment we take it. This is rich in vitamin C and antioxidants; which makes it a star food for our low-fat diets.
Ingredients
- 2 mangoes
- 2 bananas
- Juice of 2 limes (we will also use their skin)
- 4 tablespoons or 40 grams of dried cranberries
Recipe
- Peel and cut the mangoes into small pieces.
- Chop the bananas to add consistency to the smoothie in a natural and healthy way.
- Next, grate the skin or peel of the limes and squeeze the juice from these to give our juice a more exotic touch.
- Once you have all the ingredients cut and ready, add them to the mixer or Smoothie Maker and beat until you get a homogeneous and smooth texture.
- When all the fruits we need for our smoothie have been mixed, add the natural yogurt and the three tablespoons of dried cranberries (approximately 30 gr) (also reserve a tablespoon to decorate our recipe at the end).
- Mix all the ingredients for about 30 seconds.
- Last but not least, pour the contents of the blender into some beautiful glasses or glasses, and… you are ready to enjoy! Enjoy your meal!
As you have seen, preparing a mango juice recipe is not difficult at all, since it is a generally sweet fruit with a lot of water. That is why it is an excellent base for almost any juice or beverage.

Sushi
Thinking of having sushi or sashimi for dinner or lunch? What a great idea! But when you start searching up sushi places near you, how do you know if a restaurant or sushi counter is high quality or if it’s somewhere you should avoid? Of course, you should always take a gander at the reviews of any restaurant or sushi counter you’re going to try for the first time, but there are some other ways to tell if the sushi or sashimi counter you’re visiting is authentic and therefore a “good” place for sushi.
Fish Cut to Order
An important characteristic of a high-quality sushi and sashimi restaurant or counter is that the fish is sliced to order. In other words, it isn’t sitting around in a display case all day waiting for someone to order it. The reason for waiting to cut the fish until it’s ordered is that the skin protects the flesh and helps it retain its flavor. As soon as the flesh is exposed to the air, it begins the process of oxidation and when the fat layer that sits right below the skin is oxidized, even the most flavorful of fish will begin to lose its flavor.
On large fish, the skin should be kept on while the fish is being sliced so that it continues to protect the flesh until the very last moment before it is served. This ensures that the customer gets the freshest, most flavorful sushi possible. This doesn’t mean that a place that has sushi or sashimi in a display case isn’t selling fresh sushi. It’s likely that those are there to show customers what they can get and they actually cut the sushi fresh before it’s served. You can always ask your server to find out for sure.
Sliced Properly
Sushi and sashimi should also be sliced properly according to the type of fish being served. For white fish with firm flesh, servers should use the sogigiri technique. This cutting style keeps the fish as thin as possible and is achieved by holding the knife at an angle and cutting a thin slice of fish off the end of a cutting board. A chef will use a thin, sharp knife to make sure they can cut the fish as thin as possible without it falling apart.
Fish that are more delicate in nature, including tuna, the hirazukuri cutting method should be used. This method cuts the fish in thicker segments so that the flesh stays together after it has been sliced. It also allows the full flavor and texture of sashimi to be enjoyed in a single bite.
Rice is Proportional
Even though the amount of fish in a single piece of sushi is fairly small, you don’t want to have a disproportionate amount of rice hiding the fish’s flavor. Since the fish is the expensive part of the dish, some sushi places try to save money by giving you a very small piece of fish and a lot of rice. Professional chefs typically recommend approximately 80 or 90 grams of rice per sushi roll, but this can vary based on the type of fish used. This recommendation makes it difficult to determine by a piece of sushi if the proportion is correct, so you might have to taste the sushi before determining if the restaurant or sushi counter is using a proper balance of rice and fish.
Conclusion
Certainly, the best way to tell if a sushi or sashimi restaurant or counter is of high quality is to try it yourself. You may discover that a restaurant that isn’t very popular among the majority of diners is just what you’ve been looking for. Be adventurous and visit several sushi and sashimi places to determine which one is your favorite.

BBQ
Summertime is all about relaxing, friends and family, and sharing good food and good times. One of the best things about summer is the grilling. There is nothing better than the smell of barbeque meat in the air. However, summer is also a time for sun exposure, which can lead to sunburned skin.
If you want to enjoy barbeque season without the hassle of sunburn and without spending too much time in the sun, read this article to learn how you can set up an indoor BBQ with minimal effort.
What are the benefits of an indoor BBQ?
Whether you live in the city or the country, an indoor barbecue is a great way to enjoy your summer. There are many benefits to having an indoor BBQ. First, it is great for the family to be able to enjoy the summer weather and cook food together. It is also a great way to spend time with friends and family on those hot summer days.
It is also a great way to cook food for parties and events. In addition, it is also a great way to keep your home cool during the summer. Lastly, it is a great way to cook food without a lot of mess.
How to set up an indoor BBQ
Setting up a BBQ is a fun and easy way to enjoy a summer afternoon. There are occasions though whether it is too hot or raining when you cannot enjoy your BBQ outside. This is when an indoor BBQ comes in handy. There are many things you will need to set up a great indoor BBQ, but this article will give you the information and knowledge you need to have a great time.
What is the equipment you will need
In order to set up an indoor barbecue, there are some things that you will need. The first thing you will need is an indoor smokeless grill. An electric grill can provide the great barbecue experience you want without having to tamper with smelly charcoal and messy propane tanks. There are many different models and features so make sure to take time to research before purchasing. Pat’s offers a great guide on what to look for in an indoor grill here. It will allow you to cook easily indoors and some models are versatile enough to be used inside and out.
The second thing you will need is of course some great meat for grilling. You can either buy some marinated or ready made burgers or steak, or you can be a bit adventurous, and try something new. This is the perfect time to try a new recipe that you have been thinking about.
If you are having guests that are vegetarians, you may also want to consider some non-meat courses. One of my favorites to make on the grill is a vegan quesadilla, you can get the recipe from this site. It is easy to make and tastes great.
For any successful barbecue you will also need some great side dishes. Whether your main course is chicken, turkey, or other meat you will want to have a wide selection of great side dishes. Many vegetables you can cook on your indoor grill . The best advice for these side dishes is to always stick with the classic.
Lastly, you will need a great beverage and wine to set the mood. Be sure to have a few different wines on your table so that you can sample a wide variety of wines. This will keep your guests happy and guessing what the next wine is going to taste like.

BBQ
How long does it take to set up an indoor BBQ?
If you are in a hurry, and want to get your indoor BBQ up and running as soon as possible it will not take too long. If you already have grill tools on hand, then you can be grilling in no time at all.
A smokeless grill will usually come up to temperature within a few minutes of turning it on. This will vary by the model you have, but typically the temperature will reach 350 degrees in no more than 30 minutes. As an example, my Ninja Foodie grill takes approximately 10 minutes to reach 350 degrees.
Once your smokeless grill is up to temperature you can begin preheating your bbq cooker and start grilling on it as well. Once you are ready to eat you simply remove the meat from the grill and apply BBQ sauce or ketchup.
How to maintain an Electric BBQ Grill
Most indoor grills offer a non-stick surface so cleanup is usually a breeze. There are a few things that you will want to be careful about.
One thing to keep in mind is that some indoor grills may not handle the heat as well as an outdoor grill does. If you are attempting to cook a large steak, for instance, it would be best to cook it outdoors and then transfer it into the indoor grill for serving. Always use your indoor BBQ grill with care so that you do not ruin the non-stick surface or cause damage to the unit itself.
Are There Any Other Benefits to Using An Indoor Grill?
Grilling indoors during the summer is a great way to enjoy your BBQ without a lot of hassle. There are many other benefits to using an indoor grill.
Not only can you enjoy your food without the sun, but you can also avoid some of the bugs that come out at night. If you want to impress your guests with great grilled food, an indoor grille may be the perfect solution for you.
An indoor grill can also be healthier as many have features to drain and remove grease from the meat. This is a great feature for those who want to avoid consuming a lot of fats and oils. In addition, indoor grills do not generate a lot of smoke, so you will not have to worry about breathing in all that toxic smoke coming from an outdoor grill.
Conclusion
In conclusion, an indoor barbecue is a fantastic way to enjoy your summer. You get the great taste of barbecue without worrying about sunburn or sticking to your grill. It is also a great way to cook inside on those rainy or hot days that do not make grilling outside an option.
If you follow the tips in this article, and have all the right equipment, you will have a great time setting up your indoor grill and cooking some of your favorite meats at home.

Barbeque
Before you break out the grill and start cooking up some barbecue for tonight’s game, be sure to check out our Beginners Guide to Getting Started in Barbeque. Learn everything from the first step of what type of equipment is needed to tips on grilling anything off your grill. Give your family and friends a taste of some of the great barbecue from around the world today without breaking your wallet.
Below you can find our Beginners Guide to Getting Started in Barbeque.
What You’ll Need
Depending on your personal preferences, there are a wide variety of grill styles to choose from. No matter what grill you choose, you will need the following supplies:
Barbeque Grill
You will need a grill to put the coals on, of course. The average price of a basic bbq grill is $100.00 and can go up to several thousand dollars for smokers that are used for competition purposes. There are a wide variety of grill styles to choose from. The most popular include:
- Charcoal Barbeque Grills
- Propane Gas Barbeque Grills
- Electric Barbeque Grills
- Smokers
No matter which style of grill you choose, make sure the grill you get is big enough for what you plan on cooking. This will vary between the different types of grills since some cooking method require more space than others do. You can learn more about grills on a variety of grilling and smoking specific sites like Pat’s Bar and Grill. The most common is the charcoal bbq grill which takes up about 180 square inches and the propane gas bbq grill which takes up about 250 square inches.
In addition to a grill you will need other supplies such as the following:
- Fuel (Propane Tank, Charcoal or Wood)
- BBQ Rubs & Marinades
- Starter (for Charcoal Grills)
- Grill brushes (for Charcoal Grills)
- Grill gloves
- Quality Cuts of Meat
Grilling Basics
To get start grilling, you will want to warm-up the grill to get it ready to use. Here’s how for a charcoal grill:
1. Fill all the burners with one-third of a tank of liquid charcoal (also referred to as briquettes) or wood chunks, whichever you prefer. This amount is enough for about four hours of cooking time on average, so start low if you don’t have a large grill. You may need more if your fire is smaller or spread across many coals.
2. Light the coals or wood chunks with a lighter, then cover the grill and let it sit for about 10 minutes.
3. Uncover the grill, adjust all the burners to medium heat and allow 30 minutes to an hour for the grill to heat up fully.
4. Half-fill a spray bottle with water and lightly mist your food (especially any of your spicier cooked items) as you place it on the grill to keep them moist while they cook and to help them brown better.
5. After about three-quarters of the cook time is over, spray your food again with water. This will help it stay moist while cooking and give it a nice glaze as it cooks.
6. If you need to add more coals or wood chunks, do so about halfway through your cook time. If you leave them on the grill for too long, they will burn, or smolder and smoke a lot rather than actually producing heat.
Tips and Tricks for Grilling
Below we have prepared some great BBQ tips and tricks to help get you started.
Prepare your grill the night before or first thing in the morning and let it sit for a few hours. This will allow the coals to get hot and the grill to heat up so you get a good cook. If you just light your bbq up an right before dinner, there’s a good chance you won’t have enough heat to really cook well.
Make sure you know how to choose a great cut of meat. This can make a big difference in the taste of your meal. For example, if you use a less flavorful cut or a poor quality, it will lack flavor. In addition, there are different cuts of meat that work better for smoking vs grilling.
Make sure to allow the entire amount of time you set aside for the bbq to cook. It might take longer if the weather isn’t right or if you cut up an already tough part of meat and haven’t allowed enough time for it to cook all the way through.
Foil will work well to keep your food moist while on the grill and avoid flare ups, but it doesn’t do a great job keeping things warm. Try not to take too much food out of the oven or you run into problems with the food drying out, getting cold and losing flavor in the process.
If you have a very high heat bbq grill, use reflective foil to keep the heat in. This will also help you avoid flare-ups and help you cook things quickly.
When grilling, use a thermometer to make sure your food cooks properly. For example, if you are cooking a burger medium rare, it should be cooked to about 140F.
Many people make the mistake of trying to grill sweet things like chicken at too high a heat. This can give them a burnt taste, or make them dry or tough if they are pre-cooked or thrown on at too high of a temperature.
You will want to watch your food closely while cooking it so you don’t overcook any of the pieces, especially vegetables. You don’t want them to overcook and become bland or burnt.
If you want to make great barbecue, you need a good supply of wood chunks. They add the smoke flavor and the heat so it will make a better tasting meat, or vegetables anyway. When making a batch of chicken, you will want to use about 2-3 pounds of wood per two pounds of chicken.
Conclusion
Now you’re ready to start grilling, just remember these basic steps and get your grill fired up. Practice is important when it comes to grilling, so experiment with different cuts of meat and styles of cooking. Try some new flavors while you are at it! It’s also a good idea to write down all your recipes in order for you to have them ready next time you fire up the grill.
Well, that’s about it on how to get ready to cook barbecue. We hope you have a great time grilling and cooking some delicious food!

 Organic3 years ago
EatMyBananas.com Shares A Shocking Ingredient In One Of Their Local Dishes

 Food4 years ago
Food Web Creator (Maker)

 guide3 years ago
12 Super Fresh and Easy Summer Recipes

 Education2 years ago
What is an Induction Oven & How Does it Work?
- Germany-De3 years ago
Kürbissuppe – Rezept Cremig Geröstete

 Fruits3 years ago
Top 10 Fruits for Weight Loss

 Organic3 years ago
What is a healthy diet?

 Food3 years ago
How to make Smoothies Shakes?